Do you love great lightning photos? Want to make it into a superb lightning photo yourself? We have put all our experience into this step-by-step tutorial to help you get the most out of your lightning photography!
What you will need
- A camera with the option of making long exposures. Any interchangeable lens camera (DSLR or mirrorless, both work equally well) will have the option, and many compact cameras and phone cameras also have the choice.
- A remote trigger for the camera or timer.
- A tripod.
- A thunderstorm. Preferably at night.
The great thing about lightning photography is that you do not need professional photo equipment to get great lightning photos. Any DSLR or mirrorless camera made in the last 15 years will do fine.
How to do it
Wait for a thunderstorm, preferably in the evening or during the night. Set up the camera on the tripod. First, avoid using Auto and preset scene modes. You need to be in control of the camera. Set the mode to long exposure. There are several ways to do it, which may vary depending on your camera brand.
One of these is M—Manual. Some cameras may have B-bulb mode, which allows you to use a remote trigger to take exposures of any length. The other helpful mode is shutter priority mode (TV or S), enabling you to select your photo’s exposure time.

After selecting the mode and preparing the camera, ensure it is level. Look through the viewfinder and make sure the horizon is level. Then, focus on the lens. The easiest way to do this is to set it to manual focus and focus on a distant light.
Most cameras have Live View, which allows users to obtain precise focus. Once you have focused, keep the lens in manual focus mode to avoid the camera refocusing. Depending on the distance to the thunderstorm, set the aperture and ISO. ISO 200 and f/5.6 will be a good starting point.
There is still quite a way to an excellent lightning photo – so here are some tips, tricks, and shortcuts!
Lightning photography tips
You can use the table below for general settings. Remember that lightning bolts may vary significantly in their strength and, consequently, in their brightness. While a smaller bolt at a certain distance may be exposed appropriately, a big bolt at the same distance will be overexposed.
Also, the brightness of lightning, particularly at more considerable distances, will depend significantly on the amount of haze in the air; a very hazy airmass will dim the lightning, making it less bright, so a wider aperture or higher ISO will be needed.
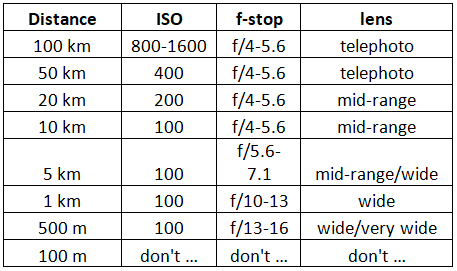
General ISO and aperture settings for photographing lightning at various distances. We assume ISO 100 is your camera’s base (lowest) setting; most do, and some cameras have a base ISO 200. You must close the aperture by an additional stop to get the same exposure (e.g., f/5.6 -> f/8, f/11 -> f/16, …).
Some additional tips to get the most out of your lightning photos:
- Find a spot that would otherwise make for a good photo. A good, interesting scene. Avoid scenes cluttered with trees or objects that will obscure lightning.
- Check your ISO and aperture: lightning will shine as a storm approaches. Adjust accordingly. And frequently!
- Check your focus every once in a while. Zoom in on your photos and check if they are still in sharp focus. If not, refocus.
- Choose a focal length (field of view or zoom) that frames the lightning nicely. There is no point in using a vast field for lightning that is far away.
- Use longer exposures to capture multiple lightning strikes, but –
- You may get unusual effects by exposing moving clouds to two or more flashes. If clouds move fast, stop your exposure after the first lightning flash.
- For every lightning bolt you capture well, there will be five you capture only partially (part of them is outside of the field of view of the camera), and 10 will be somewhere else entirely. Don’t worry about it. Point the camera in the direction with the most activity.
- Have backup batteries. And sufficient space on your memory card(s). You will be taking many photos.
- If you do not feel safe, *stop*. Pack your gear and leave. There is no point in getting hurt for a photo.
And, for all gearheads out there, there is no optimal camera. Canon is fine. Nikon is just as fine. Sony works well, too. And Fuji. And Pentax. And any other camera. Even film still works, too.

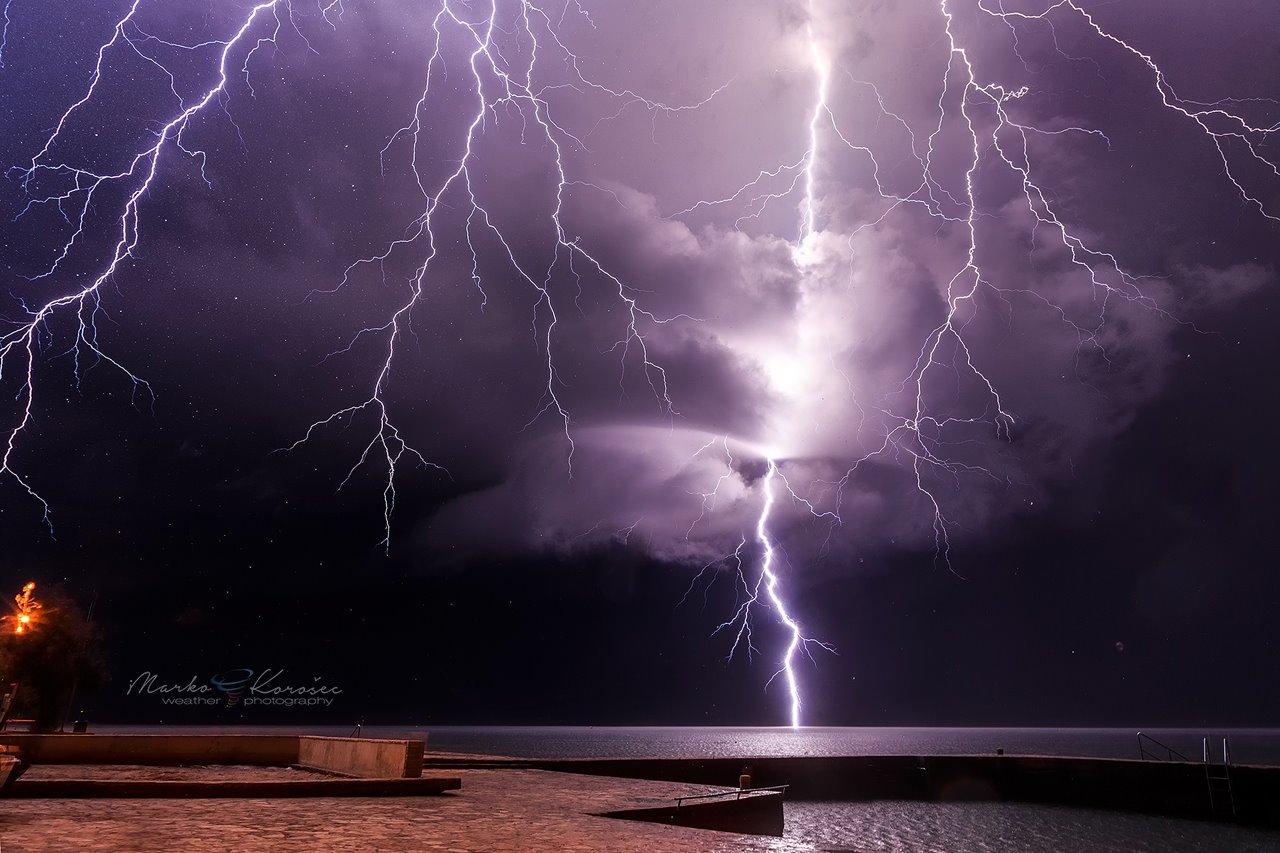
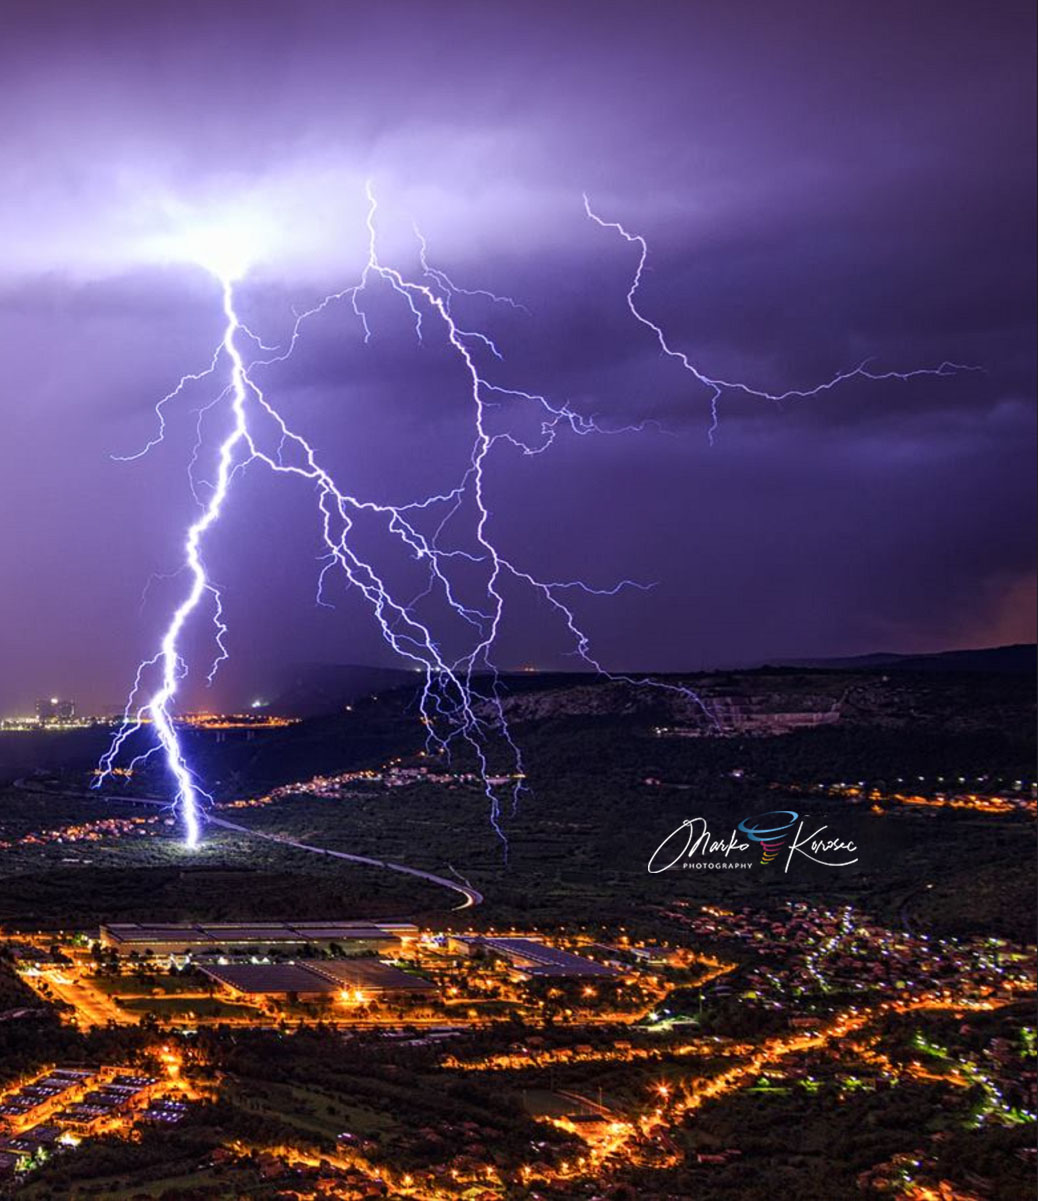
Pick a good scene. A nice foreground and background will help create more dramatic photos!

Distant storms are also an excellent target for lightning photography!
There are more ways of getting it wrong than getting it right. So here are a few more tricks on how to get it right.
Getting it wrong and getting it right
Some things can go wrong, and anyone photographed lightning has been there. Here are some lightning wrongs:

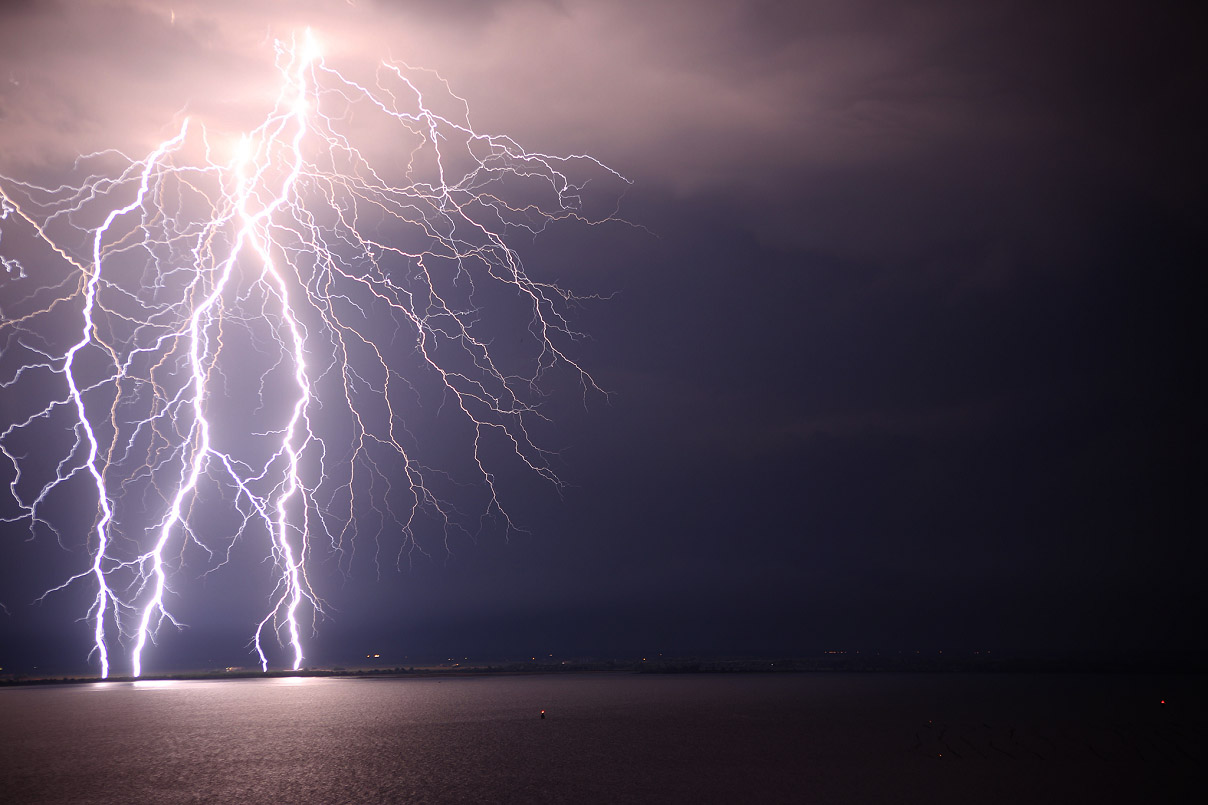
The aperture is too wide and/or the ISO too high! Unexpected (!!) close range (~500 m) lightning bolt. ISO 200, f/7.1. Completely blown out. If the photo is so badly overexposed, it is challenging and sometimes impossible to recover in post-processing.

Adjusted aperture, closed from f/7.1 to f/13. ISO 200. The next lightning bolt at approximately the same distance is exposed correctly.

The aperture is too wide and/or the ISO too high! This often happens if you aim to capture a storm structure by raising the ISO and opening the aperture.
Good exposure, fine lightning, and just plain unlucky. One of many partial misses.
Another tip: keep your optics and sensor clean. As you close the aperture, dust on the rear lens element, particularly the sensor, becomes very apparent – in the form of smaller or larger dark specks scattered across the photo.
Of course, any camera being used will slowly accumulate dirt on the sensor. You will need to get your sensor cleaned from time to time. Do not worry too much; you can easily remove dust in post-processing.
Get your focus right.
This is extremely important. There is no point in rushing and getting a soft focus: any time you have gained by rushing will be wasted in soft, out-of-focus photos. Even if you are late, if lightning is ongoing, take time to get the focus right.
This has become increasingly evident with some cameras’ higher megapixel sensors and no anti-aliasing filter. Even entry-level cameras now have ~25-megapixel sensors, and higher-end cameras are around 50 megapixels. They are unforgiving about focus! Get your focus right.
Lightning photography – Safety
Always remember – safety first! There’s no point in getting injured or killed for a photo! If lightning strikes within several kilometers, you are in danger. Consider your actions. If you feel your hair rising or even feel or *hear* the static electricity – get out of there immediately.
There will be other thunderstorms. Always keep close to a shelter or your car and retreat inside when the situation becomes unsafe!
Daytime lightning photography
You have probably seen one of those spectacular photos of daytime lightning. Those photos look stunning, indeed! But, as it is exceedingly difficult (but not impossible) to trigger the camera fast enough when you see the lightning bolt, you will need an additional piece of equipment – a lightning trigger. It is expensive but worth it if you want to capture daytime lightning.

A thought or two about photography gear
There is no optimal camera for lightning photography. Modern cameras are great for capturing lightning – there may be differences in pixel count/resolution and some differences in noise and dynamic range.
And indeed, if you ask on photography forums, you will get brand fanboy ‘advice’ – but any recent interchangeable lens camera will do great. Even less recent cameras will do fine: photos in this article were made with the most modern cameras and cameras that first came out in 2004.
Learn how to get the best photos with your current camera before upgrading to a new camera to improve your photos. Before getting a new camera, get a good tripod. If your camera body (and lens) is not weather-sealed, get or make a rain cover.
Shoot!
You’re set. Good luck! And remember, if you do not get a great photo of lightning on your first try – don’t worry about it. Nobody got all those great lightning photos on the internet on their first try. It takes perseverance, a good lightning storm, proper settings, a good scene, and not just a little luck.
Keep trying, and you will get a great photo soon. And don’t forget to enjoy yourself!
We love fine lightning photos! We would love to see your fine lightning shots – submit them to our Facebook Page or the SWE Photography Contest. Have fun!