Meteor photography is loads of fun and with a bit of luck, you can catch a big, bright one! Here is how you do it.
Equipment
- A camera with the option of making long exposures. Any interchangeable lens camera (DSLR or mirrorless) will have the option, many compact cameras and some phone cameras also have the option.
- A remote trigger for the camera (or timer).
- A tripod.
- A meteor shower. The stronger, the better.
How to do it – camera settings
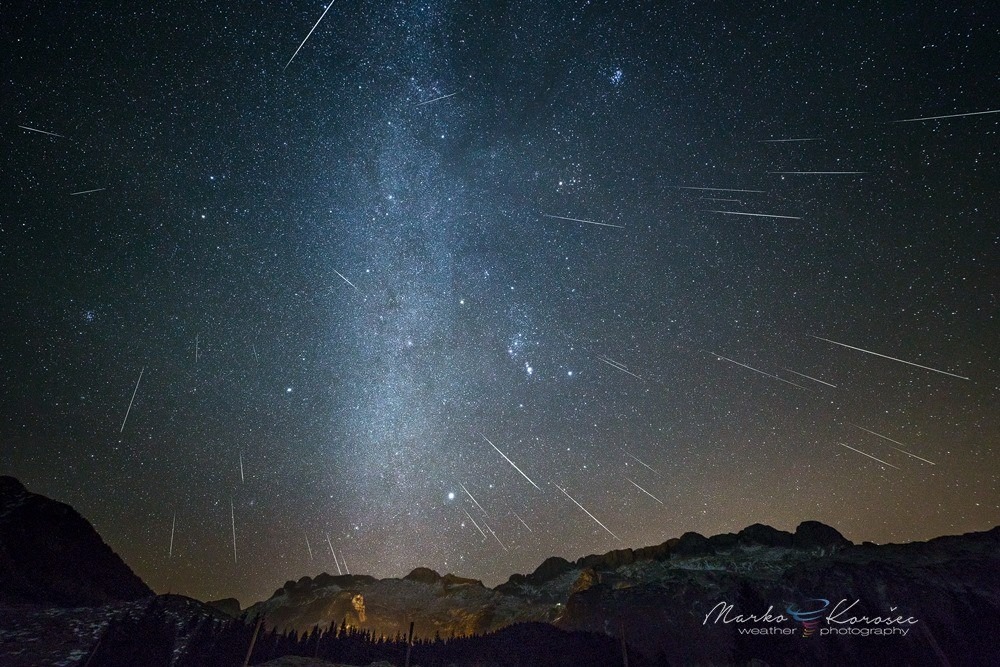
The best time to photograph meteors is during a maximum of major meteor showers, such as the Quadrantids, Perseids, and Geminids. Moderately strong meteor showers, such as the Lyrids, Southern Delta Aquarids, Orionids, Taurids, Leonids, and Ursids are fine too. When photographing meteors avoid using Auto and preset scene modes.
You need to be in control of the camera. Set the mode to long exposure. There are several ways about it and they may vary depending on your camera brand. One of these is the M – Manual. Some cameras may have B – Bulb mode. This mode allows you to use a remote trigger to do exposures of any length.
The other mode that is useful is the shutter priority mode (Tv or S). With this mode you can select the exposure time for your photo. All interchangeable lens cameras have these modes, regardless of the brand – Canon, Nikon, Pentax, Sony or any other, you will be fine.
How to do it – lens choice
Virtually any wide-field or standard lens will do, so will any mid-range zooms. Most entry and up to prosumer crop sensor (DX or APS-C) cameras come with a mid-range ‘kit’ zoom lens, which is usually between 16 and 18 mm at the wide end and f/2.8 to f/3.5.
These are fine for meteor photography. Just use sufficiently high ISO setting to capture meteors, 1600 or more will be good. How far up the ISO scale you want to go depends mostly on your tolerance for noise. 50 mm standard lenses are fine too, usually f/1.4 to f/1.8, they gather a lot of light, so they can capture fainter meteors than mid-range zooms. The downside of these lenses is the small field of view, particularly on crop sensor cameras. 50 mm will be OK, but do not go to longer focal lengths as the field of view becomes too small.
The best lenses for meteors are the newest wide-field lenses with maximum aperture f/1.4 to f/2.0, available from several brands (Samyang, Rokinon, and, especially, new Sigma Art).
In the field, after you select the mode and prepare the camera (mounted on the tripod), make sure the camera is level. Look through the viewfinder and make sure the horizon is level. Then focus the lens. The easiest way to do it is to set it to manual focus and focus it on a distant light or a star. Use live view (with maximum magnification) for this.
Once you have focused, keep the lens in manual focus mode to avoid the camera refocusing. Set the aperture to fully open and the ISO and you are ready to go. Be ready to shoot *many* photos before catching the first good meteor, but the more persistent you are, the more likely you are to catch a great one!
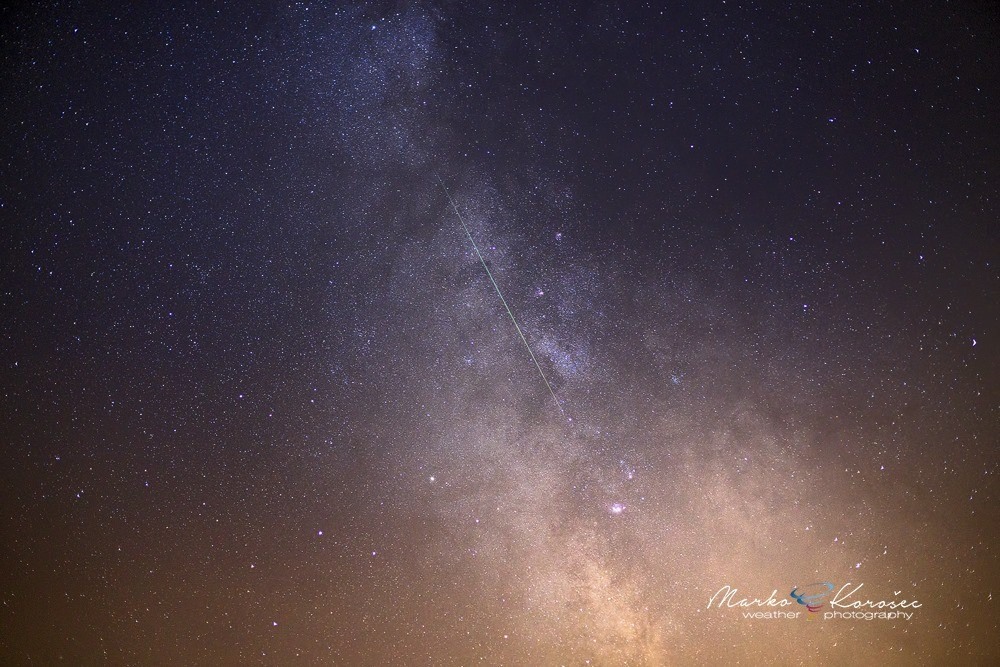
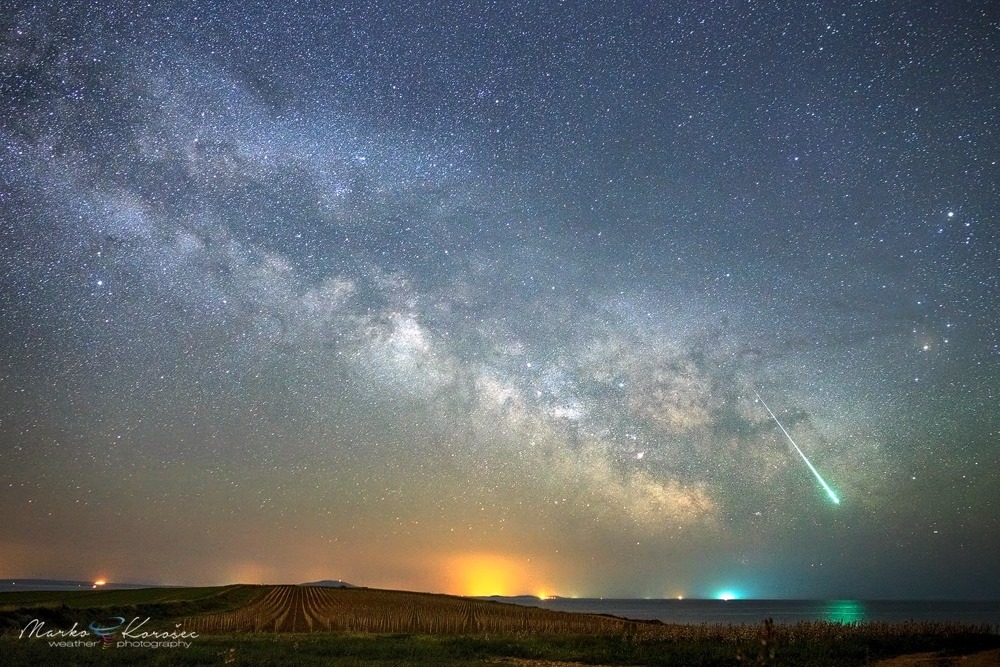
This is what a typical meteor will look like. A streak of light, likely greenish. Unlike satellites, a meteor will have a relatively smooth light curve – brightening steadily, brightest in the second half of its trail, a more steep brightness drop-off at the end. Brighter meteors can be punctuated by irregular brightness flares. Photo: Marko Korošec / Weather-photos.net
Some additional tips
- Don’t get the background too bright, you want good contrast between the sky and meteors. Typically a histogram with a peak around 1/8 to 1/6 full (left to right) is considered optimal. This will depend on the lens you use, ISO setting, and how dark your sky is. Fast lenses and high ISO settings will get your background bright faster. A bright, light-polluted sky will also get the background bright faster. An f/2.8 lens at ISO3200 under a good rural sky will take about 20-30 seconds.
- Very fast lenses, f/1.2 to f/1.8 will produce the best results under dark skies. Brighter, light-polluted skies will saturate the background quickly.
- Don’t use too short exposures. The shorter you go, the more likely you are to get a ruined photo by ending the exposure in the middle of a bright meteor. This is extremely frustrating. With a 10-second exposure, you will probably ruin 5-10% of meteors.
- Keep your horizon in the photo. Most bright meteors appear close to the horizon – you look through a larger volume of the atmosphere close to the horizon than overhead. If you use a 50 mm or another longer focal length, fast prime lens, keep your field close to the radiant. Otherwise, meteors will be too long to fit into your field of view.
- Turn off your High ISO noise reduction. You can do noise reduction in post-processing.
- Turn off your Long exposure noise reduction. At this setting the camera makes a dark exposure for every photo you make – you will only photograph the sky for 50% of the time, missing half the meteors. There are few things as frustrating as missing a superb meteor while your camera is making a dark exposure.
- Shoot in RAW format, or RAW + JPEG. It pays off to have a RAW photo to edit later.
- Keep your white balance on AUTO. It typically works best. You may want to change to a warmer setting (some prefer 3700 K) under light-polluted skies, if there is variable cloud cover and the clouds are illuminated by light pollution or if your camera is having trouble keeping the white balance constant. Shoot RAW and you can correct white balance in post-processing.
- Use Live View and a bright star or very distant lights to focus your photo. Make absolutely sure your focus is dead on. There are few things as frustrating as out-of-focus photos of bright meteors. Keep your camera and lens in manual focus mode, otherwise, it will try to refocus once you start your exposures and your photos will be out of focus.
- Try to avoid areas with moist air: find a hilltop or ridge, avoid depressions. Once your lens dews up it is next to impossible to keep photographing. You can leave a spare lens in your car and use it as a replacement once your first lens dews up. Get the other lens into the car to warm it up. Alternatively, lens warmer bands are available by a number of suppliers: they run on batteries and keep the lens just warm enough not to dew up.
- Bring backup batteries. And spare memory cards.
- Cameras do not see meteors as well as your eyes. A fairly bright meteor, as bright as the brightest stars, will register on your photo as a faint streak of light. You will need a really bright one to produce a beautiful photo. Only if you use very fast lenses and very high ISO settings will even moderately bright meteors look significant. But do not be discouraged, with a little luck and perseverance you *will* get a fine photo!
What to expect
Really – be ready to shoot many photos before a good catch! Be prepared to spend at least an hour or two under the stars to catch a good one, even in the strongest of meteor showers, like the Perseids or the Geminids.
Moderate meteor showers like the Lyrids or the Orionids take more time. But the more time you spend photographing a meteor shower, the better the chances are you will catch a good one.
Meteor photography can often bring hours and hours of shooting. But, when things go right… whoa!
